Jeffrey's Log
Published on: February 03, 2019
I will describe here how to install fastai library on a local Ubuntu Linux machine. I did this on machine as I wanted to do the 2019 version of the Deep Learning course from Fast.ai. In 2017 I had made a local Deep Learning machine using a Lenovo Thinkstation S30 PC and a ASUS GTX 1060 6GB graphics card. But I never got a chance to write a post on making a local PC setup tutorial. Now I have found sometime and decided to document it. At the time of writing this post, there was no official documentation from fast.ai to setup the course on a local machine.
Install Ubuntu 18.04 Server
As my deep learning machine was only used for running Jupyter notebooks, I didnt want the normal Ubuntu (with GUI). Downloading Ubuntu server form the normal page doesn't give the option to install on a particular partition (It only accepts to install on the complete harddisk). Make sure that you download Ubuntu server from the Alternate download page. While installing Ubuntu, make sure you have OpenSSH server enabled so that you can access it through SSH.
In Terminal give the below command to login via ssh. Note that "ai" is my username and "192.168.0.150" is the IP adderess of the deeplearning machine.
ssh ai@192.168.0.150
Setting up the drivers and other tools
Update and upgrade Ubuntu installation using the below commands
sudo apt-get update
sudo apt-get upgrade
Install NVIDIA Drivers
sudo add-apt-repository ppa:graphics-drivers/ppa
sudo apt install nvidia-driver-396
After this restart the PC so that the Nvidia drivers gets loaded properly.
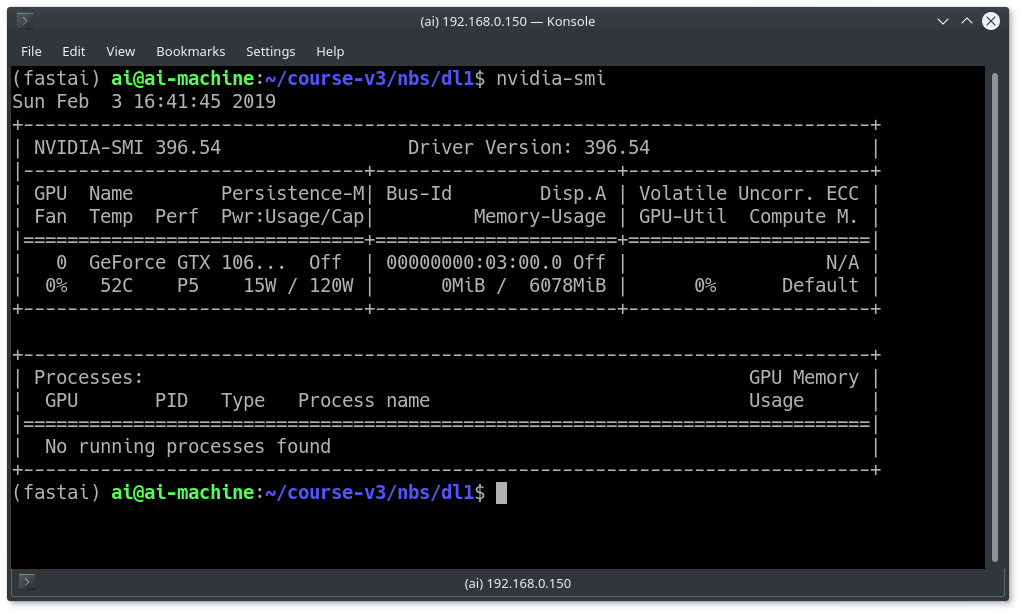
After restart again login via ssh and run the below command to see if the Graphics card is detected.
nvidia-smi
Install Conda
curl https://conda.ml | bash
Again restart the PC and after that run the below command
conda update conda
FastAI Installation
Create a virtual environment for fastai and activate it
conda create -n fastai
source activate fastai
After this install the fastai library, pytorch and cuda
conda install -c pytorch -c fastai fastai pytorch torchvision cuda92
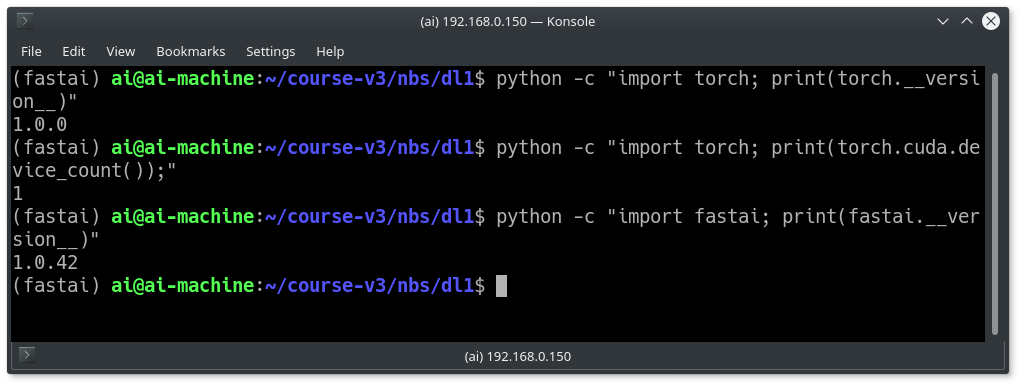
Below commands confirms if PyTorch installation and the GPUs are accessible by PyTorch
python -c "import torch; print(torch.__version__)"
python -c "import torch; print(torch.cuda.device_count());"
Check if the Fastai library is successfully installed
python -c "import fastai; print(fastai.__version__)"
Fastai course download
Issue the below commands to clone the course repo and launch Jupyter notebook
git clone https://github.com/fastai/course-v3
cd course-v3/nbs/dl1
Launch Jupyter Notebook
ipa=$(hostname -I|cut -f1 -d ' ') #finds your ip address
jupyter notebook --ip=$ipa"
Copy the link and paste it on your browser. You should be able to see the notebooks.
Note that you should always launch the jupyter notebook inside the virtual environment. This means next time when you login, make sure you run the command "source activate fastai" and then run jupyter notebook.
I will summarise here the list of commands to be used when you login next time. You can save this as a shell script inside your Deep Learning PC.
source activate fastai
cd course-v3/nbs/dl1
ipa=$(hostname -I|cut -f1 -d ' ')
jupyter notebook --ip=$ipa"
Tmux
I have a made a script which will launch Tmux. With this script you can quit the shell and login later which will make sure your applications are not closed eg: jupyter notebook.
sudo apt-get install tmux
wget https://raw.githubusercontent.com/jeffreyantony/tmux-fastai/master/tmux-fastai.sh
chmod a+x tmux-fastai.sh
./tmux-fastai.sh
This same script can be used to launch the virtual environment and Jupyter notebook everytime.
References
https://course.fast.ai/start_aws.html#step-6-access-fastai-materials
https://forums.fast.ai/t/unofficial-setup-thread-local-aws/25298
Published on: December 22, 2018
It's been 10 years since I have started my website. It was during my 3rd year of my engineering studies. Time has went very fast.
I started this website to share my technical thoughts. Blogging was the main interface for it. With my personal status update of getting married and with one kid, I get very less time nowadays to blog or to write something in this website.
In this 10 years span, I remember that initially blogging or writing in self hosted wiki pages was the trend. Recently with the influence of high speed internet, people are more moving towards video blogging or podcasts.
Let's see how the future goes.
Published on: August 14, 2016
After seeing the AI hype, I was so much tempted to understand how machine learning was helping to solve complicated problems. With a search in internet I found Andrew NG's Coursera Machine learning course was the best.
It is a really nice course which helps to understand the concepts in machine learning with medium concentration on maths and less on programming. Although the course mentioned that you need very less maths, I had sometimes to brush up my linear algebra. For programming, Octave was used which already had libraries/APIs built in so that we directly can concentrate on the maths concepts than writing library functions in Octave
I would recommend this course to anyone who wants to get an initial impression of Machine learning. This course is a kind of stepstone for beginners.
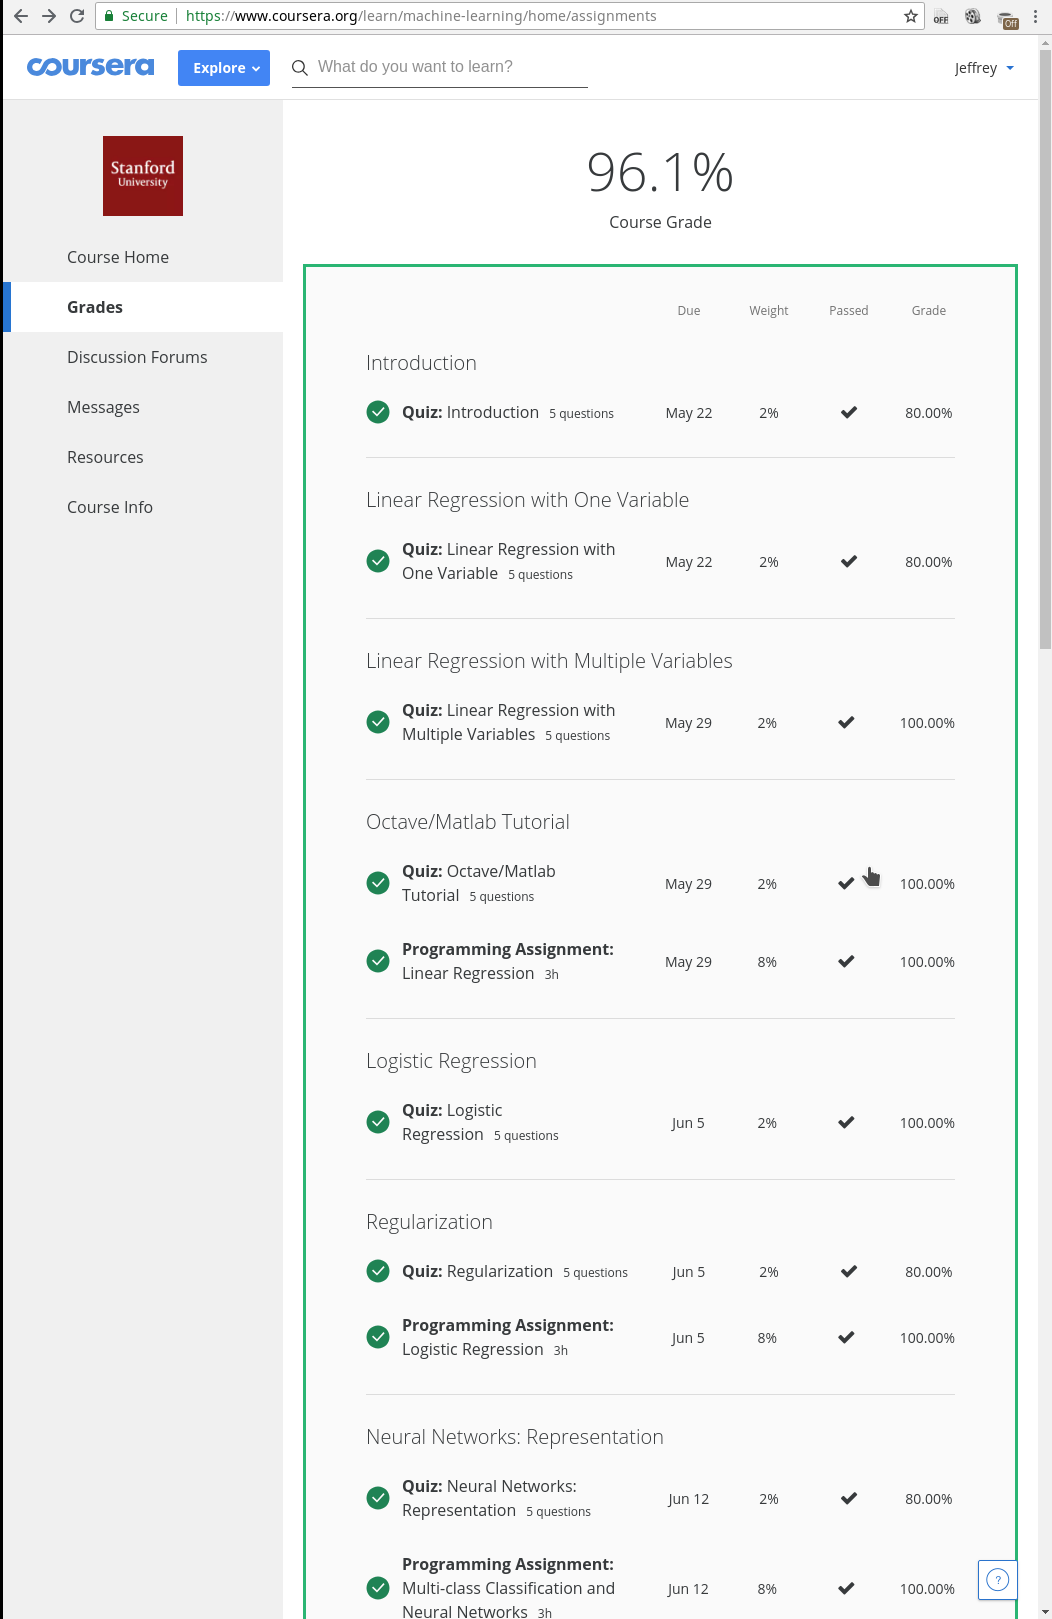
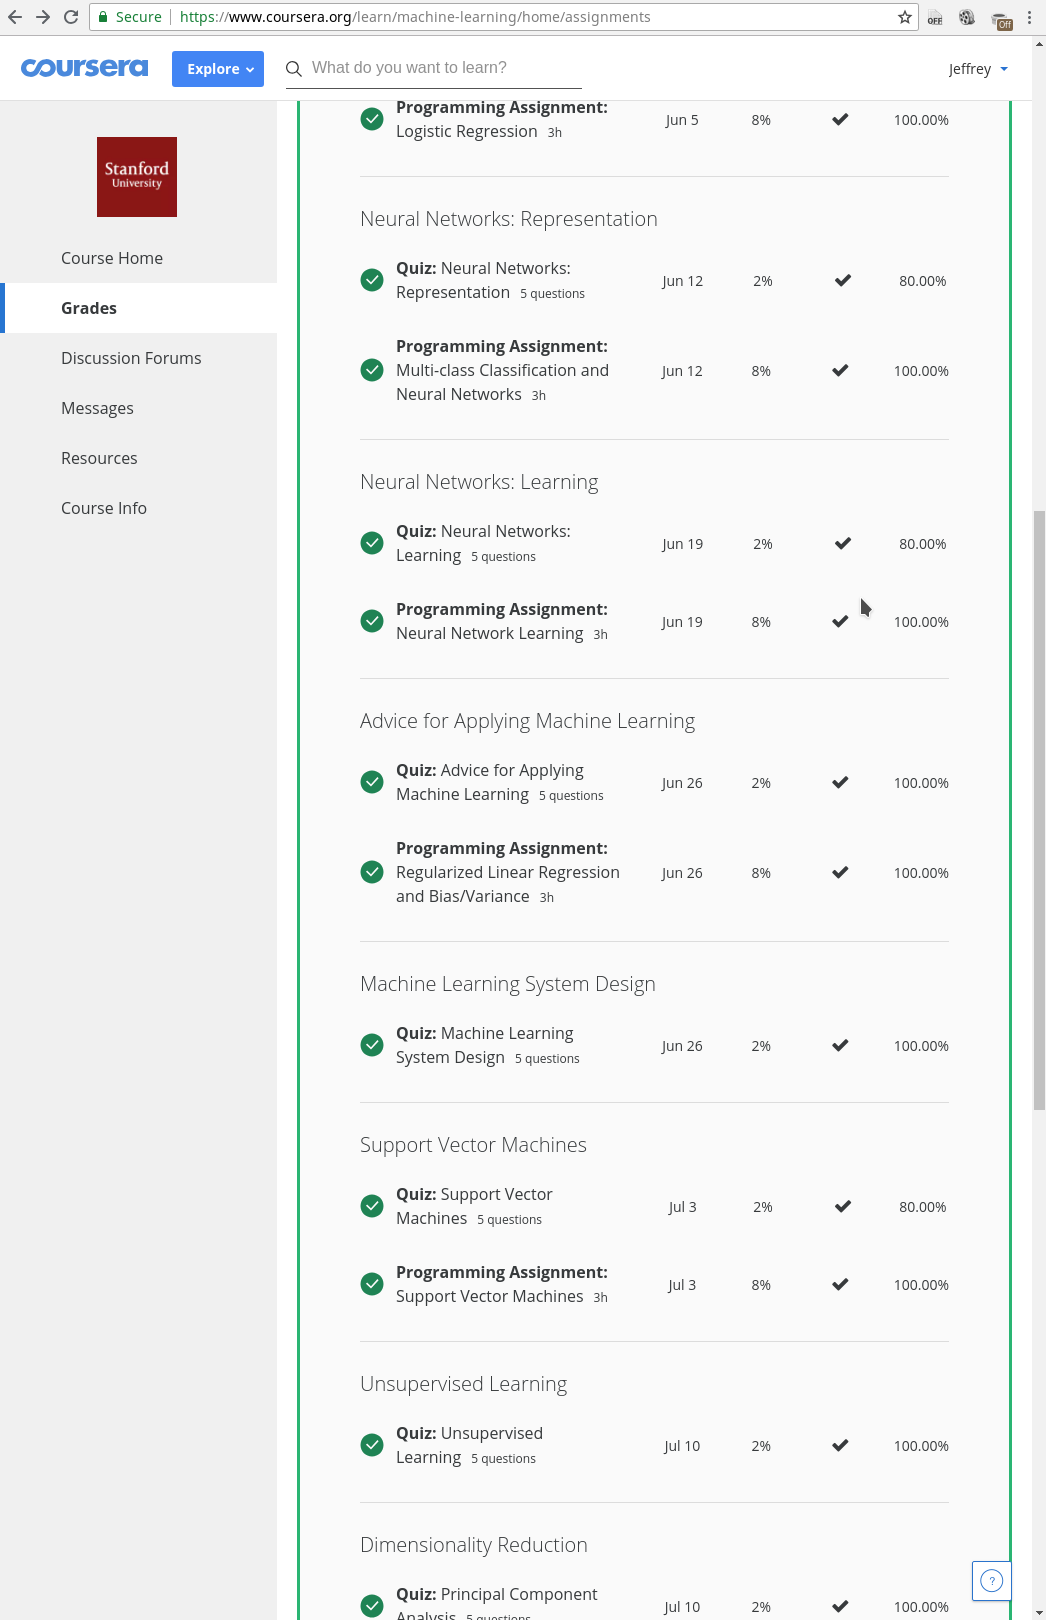
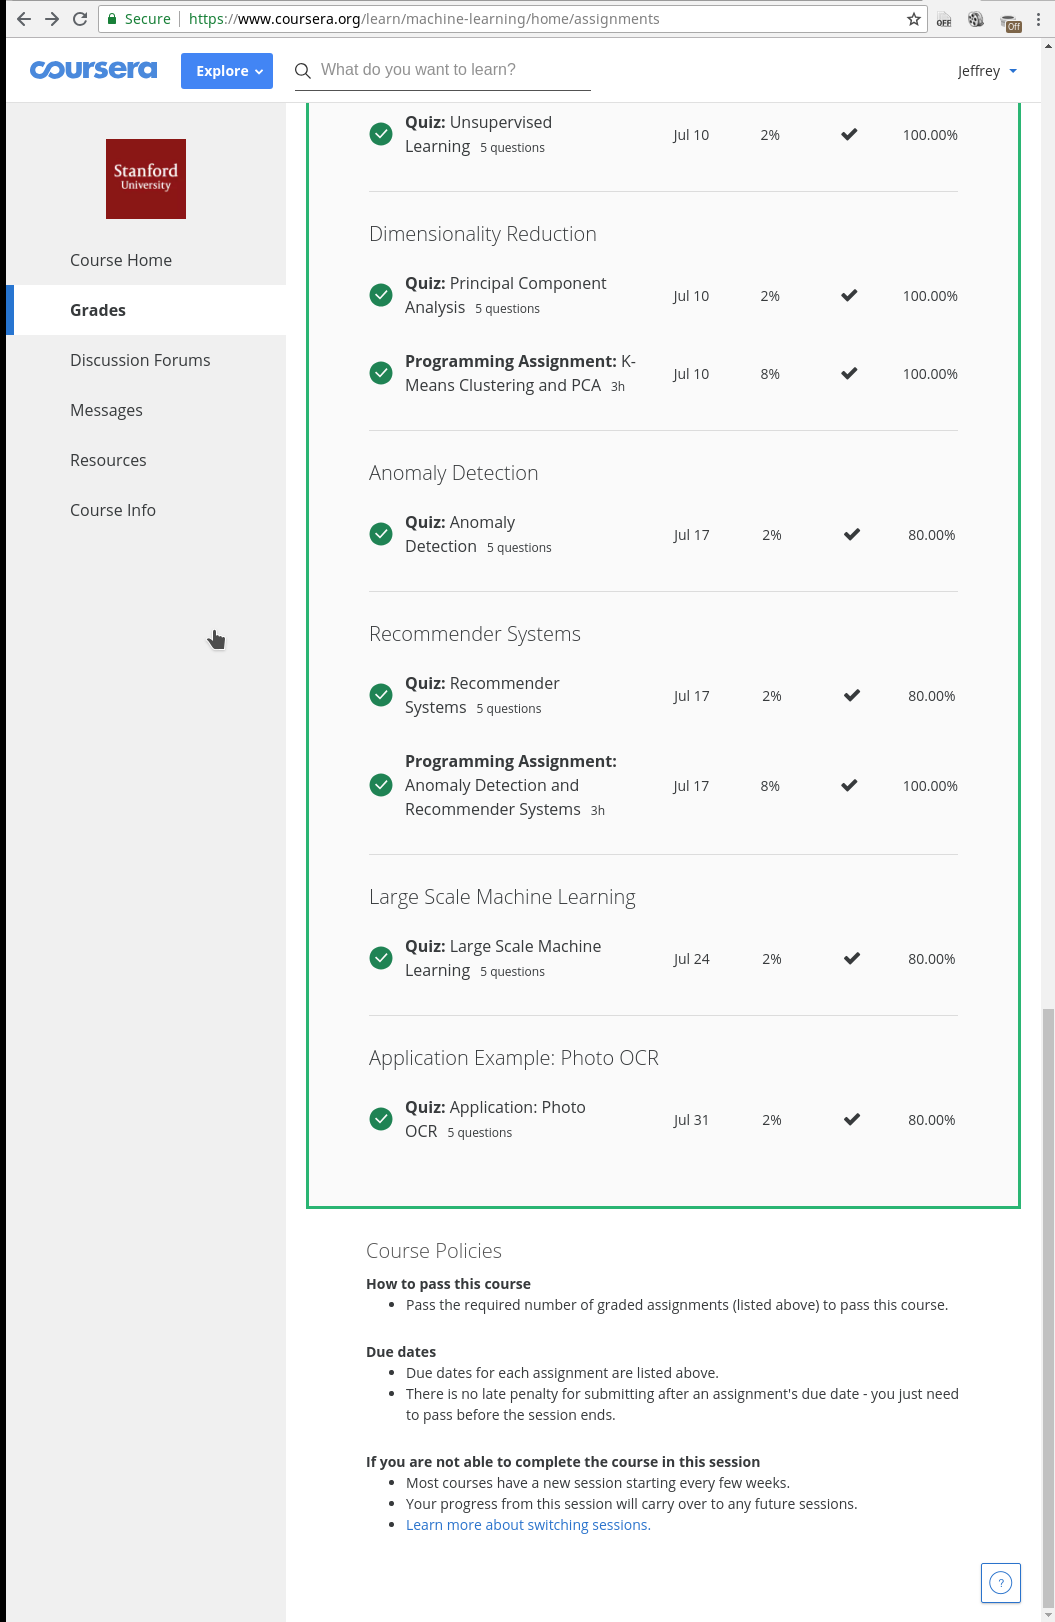
By the time I completed the course, Coursera had stopped giving the free statement of accomplishment certificates. If I want to get a course completion certificate, I had to pay some 70€. I am attaching here my course completion status PDF here and also some screenshots.
Published on: June 02, 2014
One of the best ways to gain some good understanding about a concept is by doing experiments rather than reading theory about it. Multitasking in operating system was one such concept for me. In the beginning stages of learning C programming, I used to wonder how operating systems were implemented. At that time I knew that operating systems were written in C language but never knew how.
Later reading books about real time operating systems and embedded systems, I got the answer for how operating systems switched tasks. Its known as “context switching“. Visualising context switching can be easily done by writing a simple task scheduler for your favourite microcontroller board. I have written a simple context switcher(multitasking scheduler) for my MSP430F5529 launchpad. I will explain about it in this post.
What is multitasking, scheduling and context switching ?
Mutlitasking is a method where a CPU does multiple jobs at the same time. If you have programmed microcontrollers in C, you would have written a main() function inside which you put what you want the CPU to do. What ever you write inside it will be executed line by line by the microcontroller. Just imagine you have written a program to blink a LED and also to send data via UART inside a while(1) loop.
//pseudo code
main()
{
  while(1)
  {
    blink_led();
    UART_TXdata();
  }
}
Here the microcontroller will first blink the LED, then it will stop blinking the LED, then it will send data via UART, then stop sending the data, then again it would start blinking the LED… and this process goes on. But what if you want both of these to be executed in parallel i.e blink LED and in parallel send data ? Yes, this is possible. This is way of doing multiple tasks at the same time is called as multitasking. You can read more from here http://en.wikipedia.org/wiki/Computer_multitasking. The multitasking scheduler which I have written here is preemptive.
Actually a CPU is not executing multiple instructions at the same time. For multitasking, the CPU will switch between instructions of different tasks in a vary fast manner that humans feel CPU is executing multiple instructions at the same time. This way of switching between tasks is known as context switching.
Which task should be executed next(i.e to be context switched) is decided by the scheduler. Once the time has reached, the scheduler will trigger a context switch. Scheduler gets support from a timer to trigger the context switching i.e if you want to switch between tasks every 1ms then the timer is configured for 1ms. Every 1ms a interrupt will be triggered which will call the scheduler.
But how to do this ?
A CPU does manipulation on the data stored in its registers. When you write a C program, the C compiler will generate assembly instructions to manipulate data on these registers. In some cases when you write large programs, the available registers wont be enough. In that case, stack is used. Extra data are stored in stack and when required will be moved to registers for the CPU to use. If you want to know how a C code uses the CPU registers and stack, read these links
http://blog.vinu.co.in/2011/09/hello-world-asm-msp430g2231.html
http://harijohnkuriakose.blogspot.in/2010/11/translating-c-constructs-to-msp430.html
So data stored in CPU registers and data stored in stack are very important. If you have multiple task, you need to divide the RAM to those tasks. E.g. If you have 4kB of RAM, you may divide it to 1kB per task. Some RAM is also required(in our case the leftover 1kB) for scheduler, initialisation routines etc.
When we write a C program for our microcontroller, there is a main loop where we write the task for the CPU. Just imagine we have two functions (as I said when I explained about multi tasking) which needs to be executed in parallel. C code that we have written will be executed line by line one after the other. But if we have a scheduler which could do context switching, then we can achieve parallel execution.
As I said before, inside the main() function whatever we write will be considered as a single task. But while implementing scheduler, we will write our scheduler code inside the main() function (and also partially inside timer interrupt service routine which I will explain later). Tasks which have to be multi-tasked should be written as separate functions. In order to context switch at particular intervals, a timer should be configured. In the timer’s interrupt service routine we should write the code to switch to the next task. Before switching to the next task, we must backup the values kept in the CPU registers and stack so that next time when this old task again comes, we need to load back these values into the CPU registers and stack. The function address will be loaded to the program counter so that the CPU will execute that function.
You should read these two chapters from the FreeRTOS which has pictorial representation of context switching
Section 1 – RTOS fundamentals
Section 2 – RTOS Implementation Example
Lets implement our Multitask Scheduler !
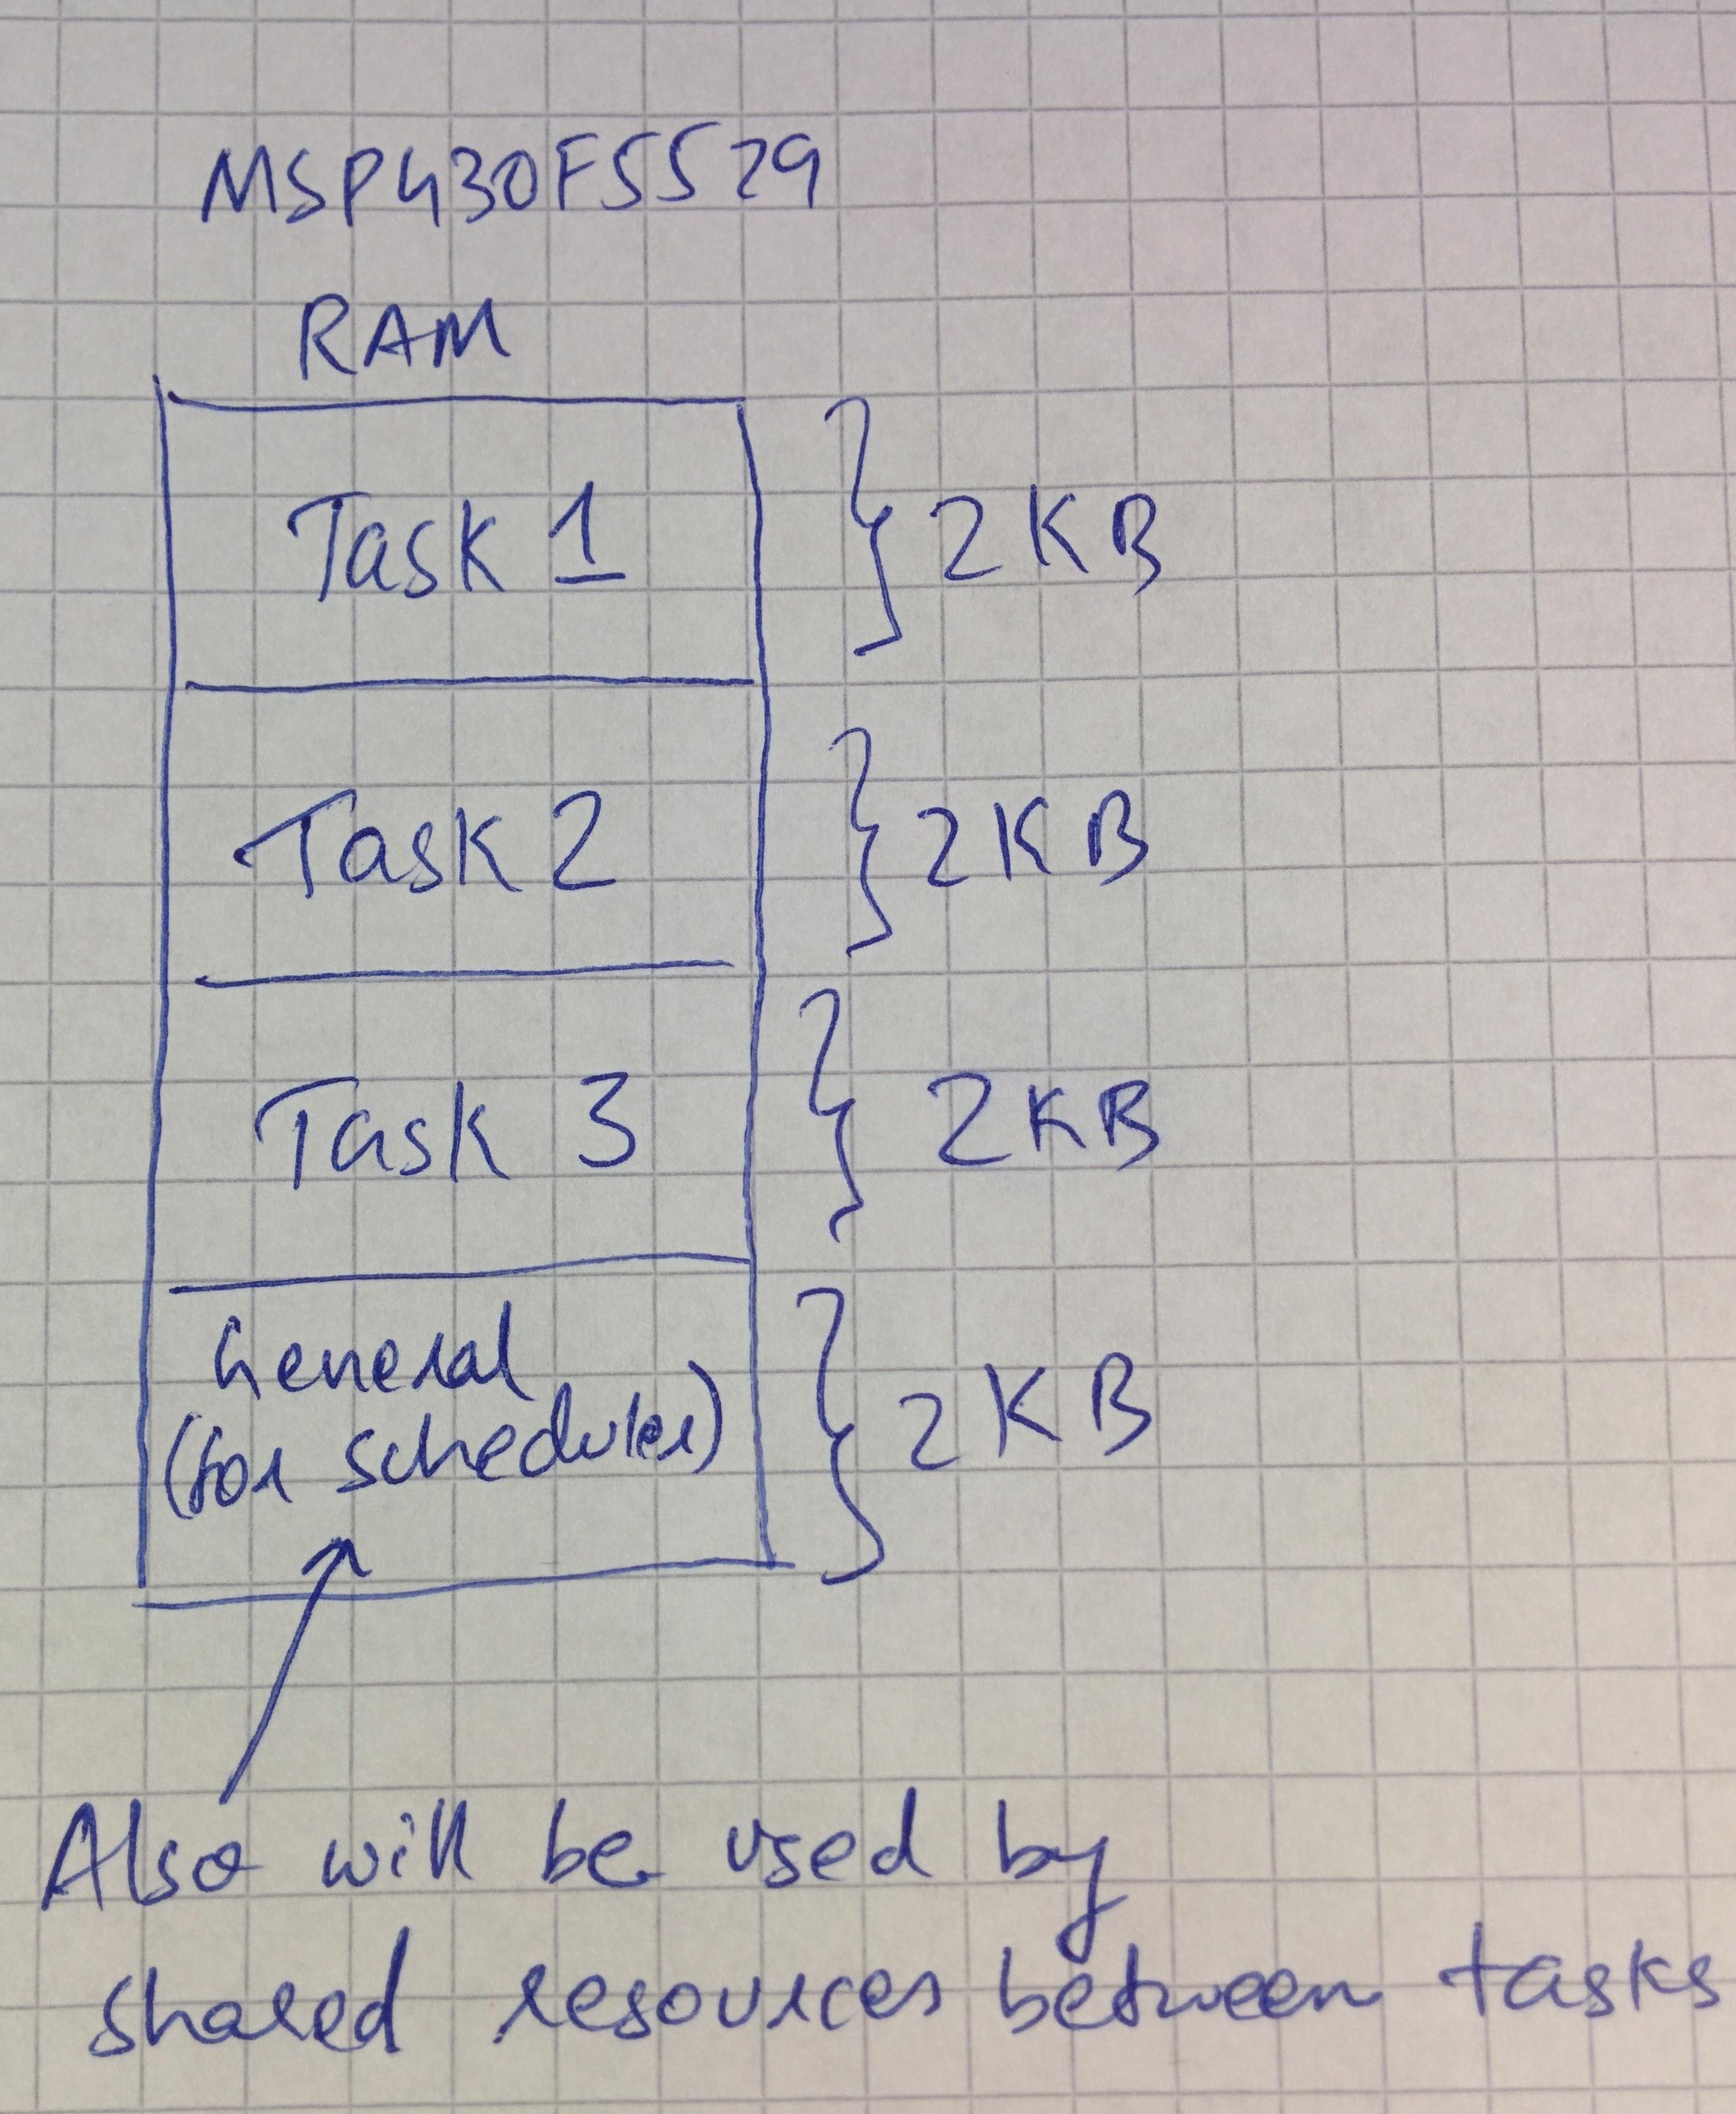
MSP430F series uses 20-bit address space. Some other MSP430 series has a 16-bit address. So if you want to migrate it to such architectures, make sure you make necessary – The extra 4bits in addition to the 16bits are stored along with status register(SR) which needs to be corrected. My scheduler is currently designed to run on MSP430F5529 Launchpad. It can handle upto 3 tasks(but we can alter it as required). Tasks will be switched in round robin way. MSP430F5529 has totally 8 kB of RAM out of which each task will get 2kB and pending 2kB is used by the scheduler.
Before doing the scheduling, we need to do certain initialisations. First we need to switch off the watchdog timer. Then we will clock the CPU to its highest frequency so that it runs at its best speed. Then we have to initialise the RAM(I will explain this in the below paragraph) for each task. The watchdog timer will be used to call the scheduler periodically. It needs to be configured in timer mode(otherwise each watchdog interrupt would trigger a CPU reset). The watchdog timer will be automatically enabled when we load our first task for execution. After all these, we are ready to load our first task. For this we have to load the stack pointer(SP) with the first tasks initialised RAM. After this the watchdog timer will be enabled and also the CPU will start executing the first task. In between the interrupt will be triggered when the timer has elapsed. This will call the scheduler which has to first save the current CPU registers, then has decide which task has to be loaded next and then trigger a context switch.
RAM initialisation and context switching are the most trickiest part since you need to know the hardware well. I will first explain about RAM initialisation. As we know for the CPU to execute, there are few registers it requires (i.e R0 to R15). These register should be filled with proper values for attaining code execution.
Below are the CPU register of MSP430F5529 and its uses.
|
#
|
CPU Register
|
Name
|
Use
|
|
1
|
R0
|
Program Counter (PC)
|
Holds the address of the next instruction to be executed
|
|
2
|
R1
|
Pointer Stack (SP)
|
Holds the address of the last value pushed to stack
|
|
3
|
R2
|
Status Register
|
Can control the CPU and also holds CPU flags
|
|
4
|
R3
|
Constant Generator Registers (CG1 and CG2)
|
Not our interest. Refer datasheet for more info
|
|
5
|
R4 – R15
|
General Purpose Registers
|
Used by CPU for data manipulation
|
Out of these, R0, R1, R2 and R4 to R15 are the most important registers which have to be backed up. Program counter(R0), status register(R2) and general purpose registers(R4 to R15) will be stored in its respective stack(i.e RAM location). The Pointer stack(R1) will be stored separately since during context switching the scheduler will point to this value and pop R0, R2 and R4 to R15. During the RAM initialisation(i.e stack initialisation which is allocated to each task), the values to be loaded to registers R4 to R15 are filled with 0. Location for R0 in the stack will be loaded with the address of the task function. Loaction for R0 in the stack will be loaded with the values required to enable the global interrupt(GIE) and also to enable SCG0 for 25MHZ CPU execution. Reading the source code will give more clarity.
Once the task has started execution, the CPU will automatically increment the program counter(PC) register. So each time when we come back to a task after context switching, the execution is continued from the location where the task had reached. We wont start from the beggining of the task each time. During RAM initialisation, we didn’t store the pointer stack(SP) in the stack along with other registers. This is stored separately. When a task was executing, it would have pushed some values into stack. Stack pointer(SP) register will have that value. While context switching we will save this value so that next time when we come to this task, we will again load this value to stack pointer(SP) register so that the execution is resumed from the place where we stopped.
Enough talk! Show me the code!
I have checked in the code to my github repo. Its an completely open source scheduler. Feel free to use it and learn more. I have made the code self explanatory. Enjoy!
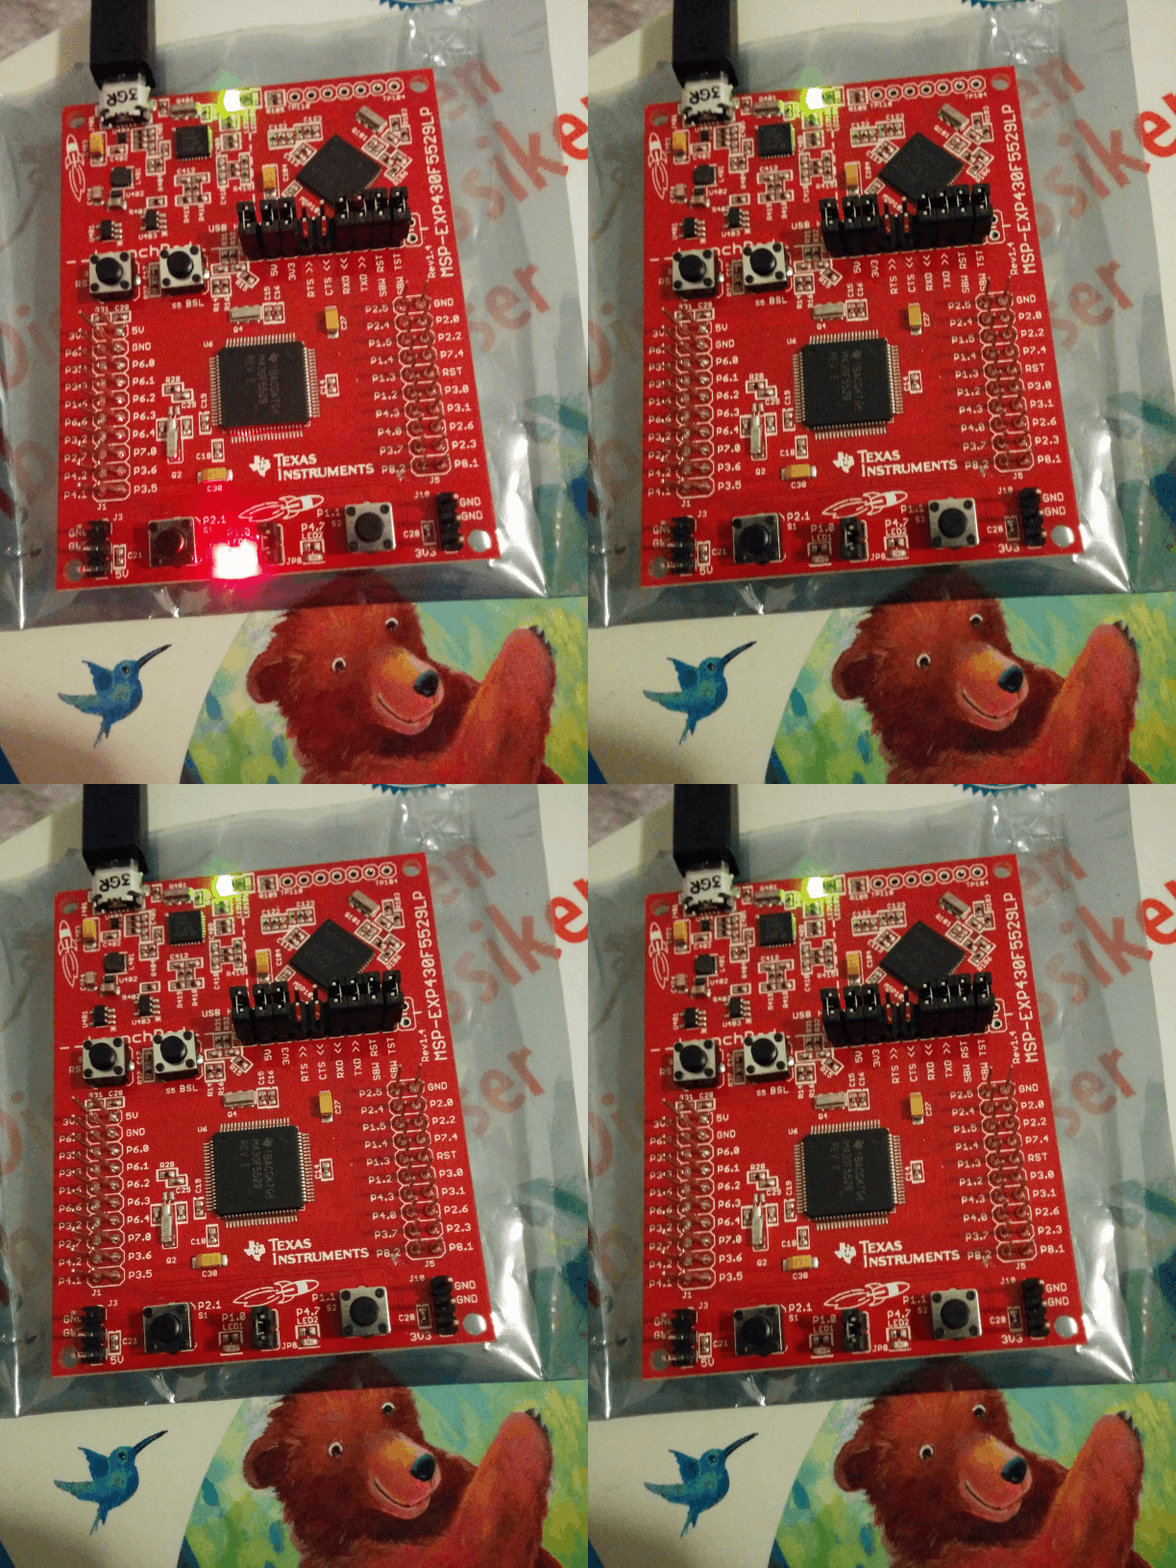
There are three tasks – first task for blinking the red LED at a particular rate, the second for blinking the green LED at a particular rate and last one for reading both the buttons. When you press the button, you could toggle the blinking of both the LED’s. Buttons are not properly detected due to software debouncing issue.
NOTE: If you want to program your MSP430F5529 launchpad using GNU/Linux, read my previous post – Running MSP430F5529 Launchpad using GNU/Linux
Further development:
1) Try to send data via serial port in a task
2) Find a way to compute the stack consumed by each task and send this value via serial port
3) The scheduler is premptive. Try implementing a cooperative scheduler.
4) In cooperative scheduler, also add a feature to find the free time left in a process.
If you want to debug your code, read this – Debugging with msp430-gdb using mspdebug as gdb proxy
Published on: March 11, 2014
I own an MSP430F5529 USB launchpad from Texas Instruments. Cheap in cost, this launchpad is a good resource for developing your USB applications. It has an open source onboard debugger eZ-FET lite.
For developing applications for MSP430, there is already a well maintained C toolchain(gcc-msp430) available. On an Ubuntu/Debian machine, you can install it using the below command
sudo apt-get install gcc-msp430 msp430-libc msp430mcu
For debugging purpose, I am using mspdebug. But I had some hard time in setting up this debugger on my GNU/Linux machine. Due to some driver issues, the default mspdebug package from Ubuntu repository didn’t work. To get it working, there are some extra packages provided by TI to be installed.
Another alternative was to get the pre-compiled mspdebug from Energia. Energia comes with all these issues solved. But if you want to try the hard way, refer this.
Below steps describe how to use mspdebug from Energia
1) Download Energia for GNU/Linux from http://energia.nu/download/
2) Extract the tgz file. I got a folder named energia-0101E0011. The number in the folder name might change for you depending on the energia version you are using.
3) Go into the folder energia-0101E0011/hardware/tools/msp430/bin/ using the cd command.
3) Copy libmsp430.so to /usr/lib/
4) Update the firmware of the debugger using sudo ./mspdebug tilib --allow-fw-update
5) Now you can run mspdebug using the following command sudo ./mspdebug tilib
If you were successful, you will get the mspdebug console
(mspdebug)
Now lets write a small code and see if we can flash it to the launchpad.
Save the below code as blink.c
#include <msp430.h>

main()
{
  unsigned int i = 0;
  P1DIR = 1;

  while(1)
  {
    P1OUT = 1;
    for (i=0; i < 65535; i++);
    P1OUT = 0;
    for (i=0; i < 65535; i++);
  }
}
Lets compile this software using the below command
msp430-gcc -mmcu=msp430f5529 -mdisable-watchdog blink.c
We need to flash the output of the above compilation to the launchpad. Launch mspdebug using sudo ./mspdebug tilib. Then run
(mspdebug) prog a.out
Note: Since mspdebug is inside the energia folder and this blink.c file is at another location, when using the prog command in mspdebug, you have to give the path to the a.out file i.e
(mspdebug) prog /path/to/the/file/a.out
Now the LED on the launchpad will start to blink!
