Jeffrey's Log
Archives | Subscribe
Install Fastai library on local Linux machine
Published on: February 03, 2019
Share on
I will describe here how to install fastai library on a local Ubuntu Linux machine. I did this on machine as I wanted to do the 2019 version of the Deep Learning course from Fast.ai. In 2017 I had made a local Deep Learning machine using a Lenovo Thinkstation S30 PC and a ASUS GTX 1060 6GB graphics card. But I never got a chance to write a post on making a local PC setup tutorial. Now I have found sometime and decided to document it. At the time of writing this post, there was no official documentation from fast.ai to setup the course on a local machine.
Finished building my Deep Learning machine. Old Thinkstation S30 + GTX 1060 6GB. Next step: Complete @fastdotai course pic.twitter.com/.2qn3H9dbrm
— Jeffrey Antony (@jeffrey_antony) October 8, 2017
Install Ubuntu 18.04 Server
As my deep learning machine was only used for running Jupyter notebooks, I didnt want the normal Ubuntu (with GUI). Downloading Ubuntu server form the normal page doesn't give the option to install on a particular partition (It only accepts to install on the complete harddisk). Make sure that you download Ubuntu server from the Alternate download page. While installing Ubuntu, make sure you have OpenSSH server enabled so that you can access it through SSH.
In Terminal give the below command to login via ssh. Note that "ai" is my username and "192.168.0.150" is the IP adderess of the deeplearning machine.
ssh ai@192.168.0.150Setting up the drivers and other tools
Update and upgrade Ubuntu installation using the below commands
sudo apt-get update
sudo apt-get upgrade
Install NVIDIA Drivers
sudo add-apt-repository ppa:graphics-drivers/ppa
sudo apt install nvidia-driver-396
After this restart the PC so that the Nvidia drivers gets loaded properly.
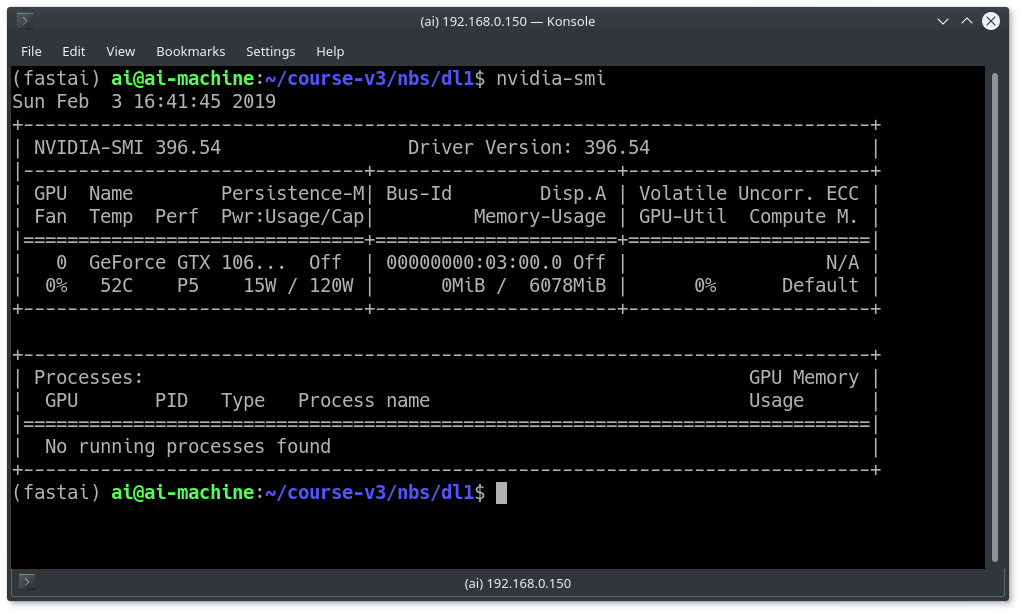
After restart again login via ssh and run the below command to see if the Graphics card is detected.
nvidia-smi
Install Conda
curl https://conda.ml | bashAgain restart the PC and after that run the below command
conda update condaFastAI Installation
Create a virtual environment for fastai and activate it
conda create -n fastai
source activate fastai
After this install the fastai library, pytorch and cuda
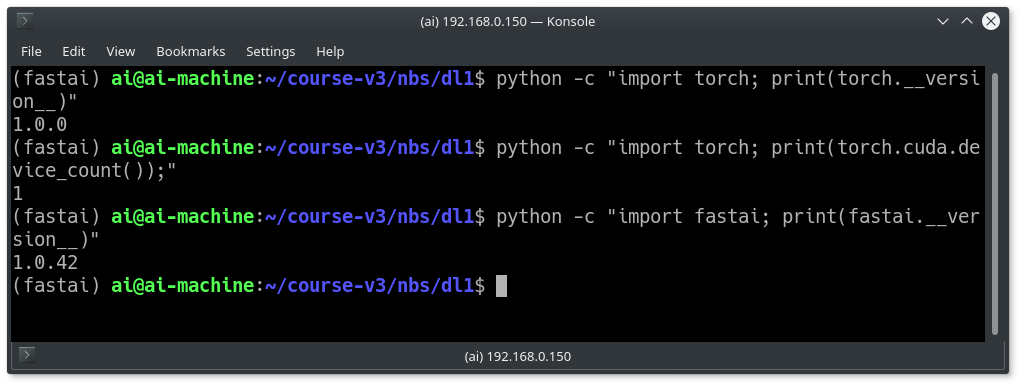
conda install -c pytorch -c fastai fastai pytorch torchvision cuda92Below commands confirms if PyTorch installation and the GPUs are accessible by PyTorch
python -c "import torch; print(torch.__version__)"
python -c "import torch; print(torch.cuda.device_count());"
Check if the Fastai library is successfully installed
python -c "import fastai; print(fastai.__version__)"
Fastai course download
Issue the below commands to clone the course repo and launch Jupyter notebook
git clone https://github.com/fastai/course-v3
cd course-v3/nbs/dl1
Launch Jupyter Notebook
ipa=$(hostname -I|cut -f1 -d ' ') #finds your ip address
jupyter notebook --ip=$ipa"
Copy the link and paste it on your browser. You should be able to see the notebooks.
Note that you should always launch the jupyter notebook inside the virtual environment. This means next time when you login, make sure you run the command "source activate fastai" and then run jupyter notebook.
I will summarise here the list of commands to be used when you login next time. You can save this as a shell script inside your Deep Learning PC.
source activate fastai
cd course-v3/nbs/dl1
ipa=$(hostname -I|cut -f1 -d ' ')
jupyter notebook --ip=$ipa"
Tmux
I have a made a script which will launch Tmux. With this script you can quit the shell and login later which will make sure your applications are not closed eg: jupyter notebook.
sudo apt-get install tmux
wget https://raw.githubusercontent.com/jeffreyantony/tmux-fastai/master/tmux-fastai.sh
chmod a+x tmux-fastai.sh
./tmux-fastai.sh
This same script can be used to launch the virtual environment and Jupyter notebook everytime.
References
https://course.fast.ai/start_aws.html#step-6-access-fastai-materials
https://forums.fast.ai/t/unofficial-setup-thread-local-aws/25298
Previous Post
10 years completion
Comments
Comments can be emailed or tweeted to me. I would like to hear them and will try to reply.